All Categories
Featured
Table of Contents
- – Rv Slide Out Roof Repair Irvine, CA
- – OCRV Center
- – Rv Rubber Roof Repair Irvine, CA
- – Repair Rv Roof Irvine, CA
- – Motorhome Roof Replacement Irvine, CA
- – Rv Rubber Roof Replacement Cost Irvine, CA
- – Rv Roof Leak Repair Near Me Irvine, CA
- – Rv Roof Leak Repair Near Me Irvine, CA
- – Rv Rubber Roof Maintenance Irvine, CA
- – Best Rv Roof Repair Irvine, CA
- – Rubber Roof For Rv Irvine, CA
- – Rv Rubber Roof Replacement Irvine, CA
- – Rv Rubber Roof Replacement Irvine, CA
- – Rubber Roofing For Rv Irvine, CA
- – Rv Trailer Roof Repair Irvine, CA
- – OCRV Center
Rv Slide Out Roof Repair Irvine, CA
To accomplish finest bond, relate to both substrates with 5-6 mil layer weight and enable to dry, after that laminate to membrane and apply stress with roller to insure 100% contact. Diluent Water, if needed. Use as obtained. Clean-up calls for only cozy water. Shop item in an amazing, completely dry location. Item ought to not be stored in straight sunshine.
Eye call If product get in touches with eye, flush with water for at least 15 mins and seek medical focus immediately. Skin call If product get in touches with skin, laundry influenced area with soap and water.
Rv Rubber Roof Repair Irvine, CA
Mask both sides of joint with concealing tape. Cut nozzle to desired bead size. Pierce seal. Lots sealant cartridge in caulking gun. Location nozzle into joint and apply sealant right into gap. Apply over 40 deg F (5 deg C)Smooth or "device" grain if needed. Remove masking tape quickly. Clean hands and tools extensively prior to cleaning with soap and water.
In instance of eye call flush eyes with water for 15 mins and call a medical professional. In situation of skin call, extensively wash skin with soap and water.
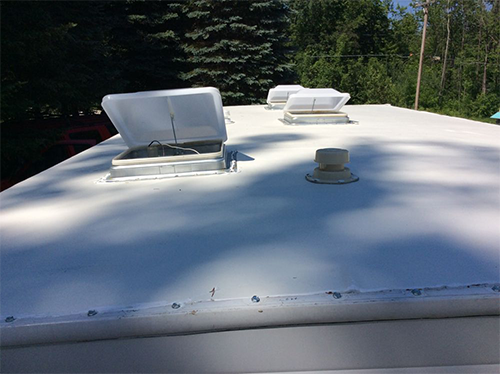
My Recreational vehicle roofing system that requires to be changed! If you're like me and have even more time than cash, then maybe your finest choice is to get an old Recreational vehicle and repair it up.
I get it. I got my RV over a year ago and really did not have the intestines to begin tackling this task until today. I'm below to inform you, if I can do it, you can do it. Can I really do it? Stay tuned and discover out! I got this 1993 Jamboree for $5000.
Repair Rv Roof Irvine, CA
Water damages! I've never ever worked on a Motor home before and I have to confess, I'm frightened. Ideally if you're thinking about doing this on your own, adhering to along on my Motor home roof replacement project will certainly provide you the nerve to dive in!
I bought a 12 x 26 SuperMax Cover by ShelterLogic (over $450 on Amazon however I bought mine from Northern Tool for about $340!) and boosted the legs with wood extensions to make the cover high enough that I can base on the roof covering and stroll underneath it. That seemed to be my most affordable alternative.
I figured I would instead have it semi-portable so I selected the cover, plus this enables me to readjust the elevation backwards and forwards when I need to. Certainly the most affordable option of all would be to just throw a good tarpaulin over the top of your RV for stormy days and only deal with bright days! Initially I increased the legs with 1 1/2 PVC pipeline that fit inside the legs and then I affixed a pipe clamp around the PVC pipeline to hold up the cover legs.
Motorhome Roof Replacement Irvine, CA
This is still a little drooping. I probably should have forked out for some stiff steel pipe from the beginning.
An old patch task on the RV rubber roof covering. As you can see, this roof covering has actually had a lot of issues over the years.
I ordered an energy blade and began slicing. The very first point I discovered is that there were 2 layers. On the bottom is the original EPDM rubber roof layer. I know it's EPDM rubber and not TPO rubber as a result of the black backing. (TPO roof is white on both sides.) In addition to my EPDM roofing system is a slim RV roofing system finish that was used later on.
I simply left the roofing system coating stayed with the EPDM roofing and pulled them up together. (You don't require to peel them up independently.) Beginning to remove roofing system finish. Peeling up area of the lower layer of rubber. This reveals that the initial RV roof was EPDM because of the black backing.
Rv Rubber Roof Replacement Cost Irvine, CA
I cut lines with an utility knife around fixtures. All rubber roofing gotten rid of from camper. This action went quite rapidly. There was a glue under the bottom layer of rubber that was still rather well stuck in several locations, but with an excellent bit of pressure it peeled off up easily.
Now I could see all the damaged plywood roofing decking underneath. I chose to peel off the rubber before removing fixtures simply so I can see what I was dealing with.
Rv Roof Leak Repair Near Me Irvine, CA
If you assume you'll be conserving the roofing system outdoor decking plywood (not changing it), then you might save yourself some cleanup problem by eliminating the components initially and then peeling off up the rubber! Much more water harmed locations on Recreational vehicle roof outdoor decking.
I went for the easiest one initially, a vent cap from a cooking area sink plumbing vent pipeline. There is no various other method around this, you just have to begin digging till you subject the screw heads.
Loosening the screws in vent cap. The screws on this vent cap were hex-head steel screws so I utilized a tiny outlet motorist to remove them. Some came out clean. Others were rusted and I had to use a vice-grip pliers to get hold of the heads and transform them little by little.
Rv Roof Leak Repair Near Me Irvine, CA
I found an old wasp nest inside the vent cover. This is a sight I'll most likely need to get utilized to, discovering the remains of pet habitation high and low. I invest a horrible great deal of my time producing great wild animals environment in my lawn so I do not get annoyed when a creature selects to establish up home in my RV.
Fortunately no one was home in this old nest so I simply tossed it. You must try not to harm these items (like air vent covers and caps) as you're scratching off the old caulk and sealer simply in situation you need to utilize them once more.
One down, 7 even more fixtures to go. Following I decided to take on the only roof air flow fan that my camper has. My roof covering air vent also had a vent cover over it. So I began scraping the substance from those screws. Starting on the roofing air vent. Equipment subjected on roof covering vent cap, the very first nut came off clean.
Bolt is spinning. The fasteners on this RV roofing vent cover were nuts on tiny bolts. The initial one came off fine with an expansion outlet package. The 2nd one just began rotating, implying the screw was not taken care of in place but turning along with the nut. Disappointment. A peek at the equipment holding back the roofing air vent cover.
Rv Rubber Roof Maintenance Irvine, CA
I didn't have any type of excellent way to hold the screw in position so instead I opted to saw through the bolts with a reciprocating saw. Sawing through bolts on roofing system vent cover. I used a cordless reciprocating saw with a metal-cutting blade however it was complicated to obtain the blade flat sufficient to get to the bolts so close to the roofing system deck.

Flexing the blade a little bit to get to close to the roof deck. Cover eliminated from roofing system air vent.
Best Rv Roof Repair Irvine, CA
Many were so old and rusted that they sheared off when I loosened then with a great deal of force. Loosening the brackets that held the air vent cover in position. Then I scratched extra caulk and roof covering sealant off the flange of the roofing system vent itself. I quickly found there disappeared screws or hardware quieting so I surrendered on the scratching and went inside the RV After scraping the caulk and sealer from flange of roofing air vent, say goodbye to screws! Unscrewing the within cover plate of roof covering vent follower in RV washroom.
A pair sheared off with a whole lot of pressure, but 2 wouldn't budge. I had to pierce out the screw heads. I selected a drill bit close to the size of the shaft of the screws that I had already drawn out and started drilling. Selecting a drill little bit for piercing out a screw head.
Rather of popping off the screw head, the plastic simply thawed away around the warm screw head. Hope I do not have to reuse this cover.
Lifting off the old roof covering air vent. There are two wires running to the roofing air vent (a black hot cable and a white neutral cord) that you'll need to clip to get rid of the old air vent.
Rubber Roof For Rv Irvine, CA
These are the cords linking the roof airing vent fan. I clipped them just over the blue splice joints. Roofing vent eliminated and tidied up. After clipping the cable and removing the vent, I tidied up any kind of continuing to be goop and obtained my first good appearance at the roofing system framework. It's steel! 1 1/2 inches thick.
Some Motor home roof coverings are framed with wood, others have metal framing. I scraped off some corrosion and made a big mess inside the washroom.
Rv Rubber Roof Replacement Irvine, CA
My last goal of the day was to obtain the fridge vent cover off. I observed RV sealer blobs at 4 points on the cover so thought there need to be screws under them. Rv Rubber Roof Replacement Irvine.
Revealing the screws in the refrigerator vent cap. Removing old recreational vehicle roof layer on top of fridge vent cap I likewise saw that there was a coat of RV roofing coating over the vent cap. These coatings are painted on with a brush so plainly whoever did this coating just blobbed know top of every little thing.
Tearing off the refrigerator roofing air vent after all screws are gotten rid of. Virtually every screw was in excellent adequate condition to get rid of with an outlet driver, but a couple were too rusty and needed to be turned out with vice grip pliers.
I peeled the remaining rubber roof from under the flange and then scuffed off the old putty underneath. I'll clean it better if and when I make a decision to recycle it. Looks like it remains in decent shape so I possibly will. Scratching off the old putty from the flange of the refrigerator roof vent.
Rv Rubber Roof Replacement Irvine, CA
Whether you simply drove off the dealership's lot or you've owned your camper for many years, you understand that your roof covering isn't under warranty. Thus, you may desire to obtain your trailer's roofing system replaced for the Lifetime Guarantee and peace of mind. And we're licensed via the Recreational Automobile Market Organization (RVIA) to repair and replace Motor home roofing systems.
Dicor's Rubber Roof Repair Membranes are self-adhesive strips of EPDM rubber that fixings tears, is extremely resistant to deterioration and has exceptional water resistance. Plus, it contains no asphalt, solvent of VOCs, making it eco-friendly.
Tearing off the fridge roof air vent after all screws are gotten rid of. Nearly every screw was in excellent enough problem to eliminate with a socket motorist, but a couple were as well corroded and needed to be twisted out with vice grip pliers.
I peeled off the remaining rubber roofing system from under the flange and then scuffed off the old putty below. Scratching off the old putty from the flange of the fridge roofing system vent.
Rubber Roofing For Rv Irvine, CA
That's as much as I jumped on day 1 after regarding 5 hours of careless job. Not a poor begin. I likewise saw this remarkable sludge mold expanding in the mulch under the camper. If you've never seen a scum mold and mildew, have a look at some time gaps of them growing! They are freaking incredible! A slime mold and mildew under the camper! Currently remain to step 2 when I remove the remainder of the roofing fixtures!.
?.!!. Whether you simply drove off the car dealership's whole lot or you've possessed your camper for several years, you understand that your roof covering isn't under service warranty. Therefore, you might wish to get your trailer's roof changed for the Lifetime Service warranty and comfort. You don't intend to mess around with a whole lot of sales individuals, either.
Rv Trailer Roof Repair Irvine, CA
Recreational Vehicle Roof Covering Repair Service Florida has actually offered the whole state of Florida for the previous 30 years and has actually been functioning only on roofing system repair and replacement. And we're certified via the Rv Industry Association (RVIA) to fix and change recreational vehicle roof coverings. When you speak to, you'll get a totally free examination of your roofing in our Hand City Recreational Vehicle Service Center location.
Dicor's Rubber Roof covering Repair work Membranes are self-adhesive strips of EPDM rubber that repairs splits, is highly immune to deterioration and has remarkable water resistance. And also, it includes no asphalt, solvent of VOCs, making it eco-friendly.
Replace Rv Roof Irvine, CAMotorhome Roof Replacement Irvine, CA
Rv Roof Maintenance Irvine, CA
Best Rv Roof Repair Irvine, CA
Rv Trailer Roof Repair Irvine, CA
Rubber Roofing For Rv Irvine, CA
Epdm Rv Roof Repair Irvine, CA
Rubber Roof For Rv Irvine, CA
Repair Rv Roof Leak Irvine, CA
Roof Repair For Rv Irvine, CA
Rubber Roofing For Campers Irvine, CA
Rv Roof Leak Repair Irvine, CA
Rv Trailer Rubber Roof Repair Irvine, CA
Rubber Roof For Rv Irvine, CA
Rv Roof Leak Repair Irvine, CA
Repair Rv Roof Leak Irvine, CA
Rv Roof Maintenance Irvine, CA
Class C Rv Roof Repair Irvine, CA
Rv Roof Leak Repair Irvine, CA
Rv Roof Repair Irvine, CA
Rv Rubber Roof Replacement Irvine, CA
Rv Roof Repair Fiberglass Irvine, CA
Rubber Roof Installation Irvine, CA
Rv Trailer Rubber Roof Repair Irvine, CA
Rv Slide Out Roof Repair Irvine, CA
Roof Repair For Rv Irvine, CA
Rv Roof Repair Fiberglass Irvine, CA
Rv Rubber Roof Maintenance Irvine, CA
Rv Rubber Roof Replacement Cost Irvine, CA
Rubber Roof For Rv Irvine, CA
Rv Roof Leak Repair Irvine, CA
Rubber Roof For Camper Irvine, CA
Rv Roof Repair Near Me Irvine, CA
Rv Rubber Roof Repair Irvine, CA
Rubber Roof Installation Irvine, CA
Rv Fiberglass Roof Repair Irvine, CA
Rubber Roof For Rv Irvine, CA
Rubber Roofing For Campers Irvine, CA
Rv Roof Maintenance Irvine, CA
Rv Roof Repair Irvine, CA
Rv Rubber Roof Repair Irvine, CA
Rv Rubber Roof Replacement Irvine, CA
Rubber Roof For Camper Irvine, CA
Rv Trailer Rubber Roof Repair Irvine, CA
Rubber Roofing For Campers Irvine, CA
Rv Trailer Roof Repair Irvine, CA
Rv Rubber Roof Repair Irvine, CA
Repair Rv Roof Leak Irvine, CA
Repair Rv Roof Leak Irvine, CA
Rv Roof Repair Irvine, CA
Rubber Roof Installation Irvine, CA
Best Rv Roof Repair Irvine, CA
Rubber Roof Installation Irvine, CA
Rv Rubber Roof Replacement Cost Irvine, CA
Best Rv Roof Repair Irvine, CA
Rv Slide Out Roof Repair Irvine, CA
Rubber Roof For Rv Irvine, CA
Class C Rv Roof Repair Irvine, CA
Rv Fiberglass Roof Repair Irvine, CA
Rv Slide Out Roof Repair Irvine, CA
Rv Roof Replacement Irvine, CA
Rubber Roofing For Rv Irvine, CA
Rubber Roofing For Campers Irvine, CA
Rubber Roofing For Campers Irvine, CA
Rubber Roof For Camper Irvine, CA
Repair Rv Roof Irvine, CA
Rv Fiberglass Roof Repair Irvine, CA
Roof Repair For Rv Irvine, CA
Rv Roof Repair Fiberglass Irvine, CA
Best Rv Roof Repair Irvine, CA
Rubber Roofing For Campers Irvine, CA
Rv Fiberglass Roof Repair Irvine, CA
Rv Roof Repair Fiberglass Irvine, CA
Rv Slide Out Roof Repair Irvine, CA
Rv Trailer Roof Repair Irvine, CA
Rv Roof Leak Repair Irvine, CA
Epdm Rv Roof Repair Irvine, CA
Rv Roof Repair Near Me Irvine, CA
In Seo Firm Irvine, CA
Find Seo Citations Irvine, CA
Rv Rubber Roof Replacement Irvine, CA
OCRV Center
Table of Contents
- – Rv Slide Out Roof Repair Irvine, CA
- – OCRV Center
- – Rv Rubber Roof Repair Irvine, CA
- – Repair Rv Roof Irvine, CA
- – Motorhome Roof Replacement Irvine, CA
- – Rv Rubber Roof Replacement Cost Irvine, CA
- – Rv Roof Leak Repair Near Me Irvine, CA
- – Rv Roof Leak Repair Near Me Irvine, CA
- – Rv Rubber Roof Maintenance Irvine, CA
- – Best Rv Roof Repair Irvine, CA
- – Rubber Roof For Rv Irvine, CA
- – Rv Rubber Roof Replacement Irvine, CA
- – Rv Rubber Roof Replacement Irvine, CA
- – Rubber Roofing For Rv Irvine, CA
- – Rv Trailer Roof Repair Irvine, CA
- – OCRV Center
Latest Posts
Fifth Wheel Service Fullerton
Atwood Rv Rubber Roof Maintenance
Rv Rubber Roof Repair Chino
More
Latest Posts
Fifth Wheel Service Fullerton
Atwood Rv Rubber Roof Maintenance
Rv Rubber Roof Repair Chino